Sponsored Link
Using Munin you can easily monitor the performance of your computers, networks, SANs, applications, weather measurements and whatever comes to mind. It makes it easy to determine "what's different today" when a performance problem crops up. It makes it easy to see how you're doing capacity-wise on any resources.
Munin uses the excellent ?RRDTool (written by Tobi Oetiker) and the framework is written in Perl, while plugins may be written in any language. Munin has a master/node architecture in which the master connects to all the nodes at regular intervals and asks them for data. It then stores the data in RRD files, and (if needed) updates the graphs. One of the main goals has been ease of creating new plugins (graphs).
Before installing munin you need to make sure you have Ubuntu 14.10 LAMP server is installed.
Now proceed with munin server using the following command from your terminal
sudo apt-get install munin
Once the package is installed, you only need to make a few changes to get your installation working.
Configuring Munin server
You need to edit the /etc/munin/munin.conf file
sudo vi /etc/munin/munin.conf
Change the following lines
Change 1
#dbdir /var/lib/munin
#htmldir /var/cache/munin/www
#logdir /var/log/munin
#rundir /var/run/munin
to
dbdir /var/lib/munin
htmldir /var/www/munin
logdir /var/log/munin
rundir /var/run/munin
Change 2
#tmpldir /etc/munin/templates
to
tmpldir /etc/munin/templates
Change 3
the server name on the line localhost.localdomain should be updated to display the hostname, domain name, or other identifier you'd like to use for your monitoring server
# a simple host tree
[localhost.localdomain]
address 127.0.0.1
use_node_name yes
to
[MuninMonitor]
address 127.0.0.1
use_node_name yes
Change 4
You need to edit the munin apache configuration
sudo vi /etc/munin/apache.conf
Change the following line in the starting of the file
Alias /munin /var/cache/munin/www
to
Alias /munin /var/www/munin
and
We also need to allow connections from outside of the local computer for this do the following changes
<Directory /var/cache/munin/www>
Order allow,deny
Allow from localhost 127.0.0.0/8 ::1
Options None
to
<Directory /var/munin/www>
Order allow,deny
#Allow from localhost 127.0.0.0/8 ::1
Allow from all
Options None
you will need to create the directory path that you referenced in the munin.conf file and modify the ownership to allow munin to write to it:
sudo mkdir /var/www/munin
sudo chown munin:munin /var/www/munin
Now you need to restart the munin and apache services using the following commands
sudo service munin-node restart
sudo service apache2 restart
It might take a few minutes to generate the necessary graphs and html files. After about five minutes, your files should be created and you will be able to access your data. You should be able to access your munin details at:
http://yourserver_ip_address/munin
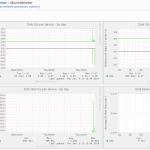
Screenshots
If you get an error message in your browser similar to the following, you need to wait longer for munin to create the files
Forbidden
You don't have permission to access /munin/
Configure Remote Monitoring
Munin can easily monitor multiple servers at once.If you want to monitor remote servers you need to following this procedure.
First you need to install munin client package using the following commands
sudo apt-get install munin-node
Now you need to edit the munin-node.conf file to specify that your monitoring server is allowed to poll the client for information.
sudo vi /etc/munin/munin-node.conf
Search for the section that has the line "allow ^127\.0\.0\.1$". Modify the IP address to reflect your monitoring server's IP address.If your server ip is 172.30.2.100
allow ^\.172\.30\.2\.100$
Save and exit the file
You need to restart the munin client using the following information
sudo service munin-node restart
Now you need to login in to your munin server and edit the munin.conf file
sudo vi /etc/munin/munin.conf
Copy the following section and change the ip address to your remote server client ip address
[MuninMonitor]
address 127.0.0.1
use_node_name yes
to
[MuninMonitor]
address 172.30.2.101
use_node_name yes
Finall you need to restart the apache server using the following command
sudo service apache2 restart
Additional Plugins
The munin-plugins-extra package contains performance checks additional services such as DNS, DHCP, Samba, etc. To install the package run the following command from the terminal
sudo apt-get install munin-plugins-extra
Make sure you have install this package on both the server and node machines.


It looks like there is a typo:
When changing the www directory in the conf files, and creating the directory, they should be the same, for example: “/var/www/munin” instead of “/var/munin/www”
Also, it seems that I had to copy the “/etc/munin/apache.conf” file to the “/etc/apache2/sites-enabled” folder with the name “munin.conf”
@ tim i also needed to get the munin.conf in to the sites-enabled folder how ever i copied it to the “/etc/apache2/sites-available” folder then ran a2ensite munin.conf to enable it that way if i needed to disable it for some reason the a2dissite command would still work