
Sponsored Link
I know two possible solutions
1) Using Nautilus Scripts
2) Using kernel loop module
Now we will see each one in detailed
Using Nautilus Scripts
I am taking this tip from here first you need to download two scripts for mount iso images download from here for unmount iso images download from here
Once you have these two scripts you need to change the permissions using the following commands
sudo chmod +x /home/username/mount.sh
sudo chmod +x /home/username/unmount.sh
Now you need to copy them nautilus scripts
sudo mv /home/username/mount.sh ~/.gnome2/nautilus-scripts/
sudo mv /home/username/unmount.sh ~/.gnome2/nautilus-scripts/
That's it now you are ready for mounting and unmounting your ISO images.
Example
Mount ISO Image
Now i have one ISO image if you want to mount you need to right click and select scripts ---> mount-iso

Now it will prompt for root password and click ok

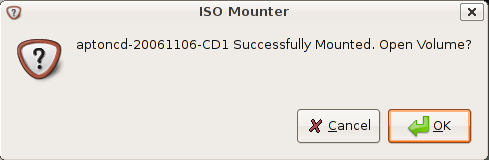
You can see the Mounter notification like the following

Here is the Successfully mounted message if you want to open this one click ok
This shows you available contents in mounted ISO image

Unmount ISO Image
Now i have one ISO image if you want to mount you need to right click and select scripts--->unmount-iso

Here is the Successfully Unmounted message

Using loop Kernel Module
First you need to make the directory to put the ISO into using the following command
sudo mkdir /media/isoimage
Now you need to add the loop module to your kernel.
What kernel loop module does?
I want to give brief introduction to kernel loop module.Using the module loop it is possible to mount a filesystem file. squashfs is a "loop" with (de)compression (Compressed Loopback Device) and it is possible to mount a compressed filesystem like a block device and seamlessly decompress its data while accessing it.
Use the following command to load loop module
sudo modprobe loop
Mount ISO Image
If you want to mount you need to use the following command
sudo mount debianetch.iso /media/isoimage/ -t iso9660 -o loop
In the above command you can replace debianetch.iso to your own iso image.
Now you should have your iso file mounted, and accessible from your desktop.
Unmount ISO Image
Unmount ISO Image Using the following command
sudo umount /media/isoimage
I need to import email messages FROM Evolution To Thunderbird. Can anyone help me?
Hi
I’m using Ubuntu 10.04. I tried the Nautilus Scripts method to mount iso files.
Two problems have come up because of this:
a) Iso fies are unable to be mounted. (i.e. it doesn’t work!)
b) My usb flash drive, CD / DVD rom also does not work. An error message “Cannot mount “.
But the icon shows up in the “Places” menu.
Please help. I don’t know how to revert back to the settings before I performed the steps given in the post.
Incredibly helpful about the mounting. THANKS!
I tried the Nautilus Scripts but it fails to mount the file. Can you tell me why. I am using Ubuntu 10.04
Looping Kernel Module worked perfect for me although I have no idea what negative effects it is having on the system if any. Which method is preferable and why?
I am now unable to mount anything after doing these steps. It’s obviously my wrongdoing . however I am not alone in this error so that makes me feel a little better. Is there a solution to this problem yet? I’ve been looking at the comments but nothing comes up. Help wanted?
Very useful iso mount command. THX!
Hi
I’ve modified the scripts so that they work on Ubuntu 11.04. The problem was that the gksudo command will not enable the later sudo commands to work.
I modified the scripts to save the password and provide the password to the sudo commands executed later. Also modified the script to work when executed in a shell and added an option for disabling GUI in the shell as well as an option for opening Nautilus (ASK/YES/NO).
—– MOUNT.SH start —-
#!/bin/bash
# mount
OPEN_NAUTILUS=”YES” # ASK/YES/NO
USE_GUI_IN_SHELL=”NO” # YES/NO
shopt -s expand_aliases
alias sudo=’echo $pw | sudo -S -p “”‘
# Run from shell
if [ -t 1 -a $USE_GUI_IN_SHELL = “NO” ]; then
echo -n “[sudo] password for $USER: ”
stty_orig=`stty -g`
stty -echo
read pw
stty $stty_orig
# Echo newline
echo “”
else
pw=$(/usr/bin/gksudo -p –description “ISO Mounter”)
fi
if [ -z “$NAUTILUS_SCRIPT_SELECTED_FILE_PATHS” ]; then
if [ -e $1 ]; then
NAUTILUS_SCRIPT_SELECTED_FILE_PATHS=$1
else
NAUTILUS_SCRIPT_SELECTED_FILE_PATHS=${PWD}/$1
fi
fi
BASENAME=`basename $NAUTILUS_SCRIPT_SELECTED_FILE_PATHS .iso`
sudo mkdir “/media/$BASENAME”
if sudo mount -o loop -t iso9660 $NAUTILUS_SCRIPT_SELECTED_FILE_PATHS “/media/$BASENAME”
then
if [ “$OPEN_NAUTILUS” = “ASK” ]; then
if zenity –question –title “ISO Mounter” –text “$BASENAME Successfully Mounted. Open Volume?”
then
nautilus /media/”$BASENAME” –no-desktop
fi
elif [ “$OPEN_NAUTILUS” = “YES” ]; then
nautilus /media/”$BASENAME” –no-desktop
fi
exit 0
else
sudo rmdir “/media/$BASENAME”
if [ $USE_GUI_IN_SHELL = “YES” ]; then
zenity –error –title “ISO Mounter” –text “Cannot mount $BASENAME!”
else
echo “Cannot mount $BASENAME!”
fi
exit 1
fi
—– UNMOUNT.SH start —-
#!/bin/bash
# unmount
USE_GUI_IN_SHELL=”NO” # YES/NO
shopt -s expand_aliases
alias sudo=’echo $pw | sudo -S -p “”‘
# Run from shell
if [ -t 1 -a $USE_GUI_IN_SHELL = “NO” ]; then
echo -n “[sudo] password for $USER: ”
stty_orig=`stty -g`
stty -echo
read pw
stty $stty_orig
# Echo newline
echo “”
else
pw=$(/usr/bin/gksudo -p –description “ISO Mounter”)
fi
if [ -z “$NAUTILUS_SCRIPT_SELECTED_FILE_PATHS” ]; then
NAUTILUS_SCRIPT_SELECTED_FILE_PATHS=${PWD}/$1
fi
BASENAME=`basename $NAUTILUS_SCRIPT_SELECTED_FILE_PATHS .iso`
sudo umount “/media/$BASENAME”
umount_res=$?
sudo rmdir “/media/$BASENAME”
rmdir_res=$?
if [ $umount_res -eq 1 ]; then
if [ $USE_GUI_IN_SHELL = “YES” ]; then
zenity –info –text “Failed to umount /media/$BASENAME”
else
echo “Failed to umount /media/$BASENAME”
fi
elif [ $rmdir_res -eq 1 ]; then
if [ $USE_GUI_IN_SHELL = “YES” ]; then
zenity –info –text “Failed to remove directory /media/$BASENAME”
else
echo “Failed to remove directory /media/$BASENAME”
fi
fi
exit 0
also in mount.sh change:
sudo mkdir “/media/$BASENAME”
to
sudo mkdir -p “/media/$BASENAME”
works in 11.10
no, i’m wrong)
you must remove quotes from mount, umount, mkdir, rmdir, also use rmdir -rf
but still doesn’t work from gui
The original scripts worked like a charm for Linux Mint Julia.
Thanks!!
Guys.. I’m a noob.. And i need help. I still don’t understand how to change commands for mount & unmount. Can any of u help me?