
Sponsored Link
I know two possible solutions
1) Using Nautilus Scripts
2) Using kernel loop module
Now we will see each one in detailed
Using Nautilus Scripts
I am taking this tip from here first you need to download two scripts for mount iso images download from here for unmount iso images download from here
Once you have these two scripts you need to change the permissions using the following commands
sudo chmod +x /home/username/mount.sh
sudo chmod +x /home/username/unmount.sh
Now you need to copy them nautilus scripts
sudo mv /home/username/mount.sh ~/.gnome2/nautilus-scripts/
sudo mv /home/username/unmount.sh ~/.gnome2/nautilus-scripts/
That's it now you are ready for mounting and unmounting your ISO images.
Example
Mount ISO Image
Now i have one ISO image if you want to mount you need to right click and select scripts ---> mount-iso

Now it will prompt for root password and click ok

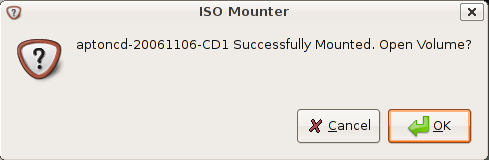
You can see the Mounter notification like the following

Here is the Successfully mounted message if you want to open this one click ok
This shows you available contents in mounted ISO image

Unmount ISO Image
Now i have one ISO image if you want to mount you need to right click and select scripts--->unmount-iso

Here is the Successfully Unmounted message

Using loop Kernel Module
First you need to make the directory to put the ISO into using the following command
sudo mkdir /media/isoimage
Now you need to add the loop module to your kernel.
What kernel loop module does?
I want to give brief introduction to kernel loop module.Using the module loop it is possible to mount a filesystem file. squashfs is a "loop" with (de)compression (Compressed Loopback Device) and it is possible to mount a compressed filesystem like a block device and seamlessly decompress its data while accessing it.
Use the following command to load loop module
sudo modprobe loop
Mount ISO Image
If you want to mount you need to use the following command
sudo mount debianetch.iso /media/isoimage/ -t iso9660 -o loop
In the above command you can replace debianetch.iso to your own iso image.
Now you should have your iso file mounted, and accessible from your desktop.
Unmount ISO Image
Unmount ISO Image Using the following command
sudo umount /media/isoimage
I had to change the quotes to straight quotes to make the script run. A quick “replace all” in gedit did the trick.
thanks! Playing starcraft without the loud disc spinning now.
I use this one:
http://mundogeek.net/nautilus-scripts/#nautilus-mount-image
Thank you very much, this works brilliantly! But indeed, why is not already available?
/me pokes Ubuntu monkeys
Please note that in Intrepid a right-click with ‘open with Archive Mounter’ does the job now.
I get “Cannot mount”. What could be the problem?
Never mind. The problem was – surprise! – a space in the file name! XD
Perfect, worked for me in less then a minute!
Works! ***w3rkZ!***
Running- Ubuntu 8.10 Intrepid on brand new hardware (CompizFusion powered on Of Course).
The above steps are easier if you have already installed the Nautilus-Scripts. After installing Nautilus-Scripts you will see the correct location to place these above “mount.sh” and “unmount.sh” scripts into. Place the two mount shell scripts in there (~/.gnome2/nautilus-scripts). Then select them both, right click them, goto Properties. Goto Permissions. Make sure the box is checked for ALLOW EXECUTION AS A PROGRAM. Then goto OK so that it saves changes of course. Then goto all open Nautilus windows (all open file browsers) and REFRESH the window so that it reloads your rightclick scripts!!! Easy.
Thank a billion!
Now I can scan ISOs for virus before burning them off.
Note:
When attempting to use the “unmount.sh” script the first try, the mount point stayed in left-hand-side column inside nautilus listing devices. To get nautilus to recognize I had unmounted the drive, I flailed around with commands, &, in the process, attempted unmount from Desktop after closing nautilus. Then I dragged to trash. Then I open back up nautilus and mount point still visible along left side, but, I go back to the ISO in question, rightclick it and goto unmount.sh, and then it unmount clean and POOF mountpoint dissapear from left-hand-side device list inside nautilus. Why did it do this? Anyone know?
Corrections:
Now I can [EASILY, Without having to open a terminal] scan ISOs for virus before burning them off.
Thanks alot for the great scripts!
It’s getting easier and easier to use linux. Thanx to the great guys like yourself who dedicated some of their time for helping others!
thank you very much. great scripts, sooo handy. u rock man 🙂
Jesus Christ. Two god damn much work.
nice script you made there.
Timberland for men
This is great, thanks for writing this up!
Thanks, For me it works….
just wanted the mount command
and found this page via Google
thank you very much!
This so nice! I am fairly new to the linux community, but I love all the great work and super solutions you people have come up with!
Can this work for Helena 8.0 mint.
I’m using Ubuntu 9.10 and the Nautilus scripts worked for me; modprobe loop gave me the error “Module loop not found.”
Using Nautilus’ “Open with Archive Mounter” only worked with some ISO images, not all of the ones I tried.
I could not unmount it, once it had to fix it some other way every time I turn on ym pc
/media/cdrom0 opens with our without cd in drive
can anyone tell me what to do?
Thank you for the information this was very helpful !!!
It works…
Thanks…
well done
O_o. Great! Thanks
works gr8.. thnx
Brilliant tutorial! thanks alot!
It is not working in Lucid Lynx. Shows “cannot Mount iso”! do you have this scripts’ latest versions?
Is there any prob with the $BASENAME variable?
I can’t get an echo out of it after the step:
BASENAME=`basename $NAUTILUS_SCRIPT_SELECTED_FILE_PATHS .iso`
why is this?
am using lucid
excellent script, only one thing …the ISO file’s name should not contain blank spaces… you get an error if any