
Sponsored Link
I know two possible solutions
1) Using Nautilus Scripts
2) Using kernel loop module
Now we will see each one in detailed
Using Nautilus Scripts
I am taking this tip from here first you need to download two scripts for mount iso images download from here for unmount iso images download from here
Once you have these two scripts you need to change the permissions using the following commands
sudo chmod +x /home/username/mount.sh
sudo chmod +x /home/username/unmount.sh
Now you need to copy them nautilus scripts
sudo mv /home/username/mount.sh ~/.gnome2/nautilus-scripts/
sudo mv /home/username/unmount.sh ~/.gnome2/nautilus-scripts/
That's it now you are ready for mounting and unmounting your ISO images.
Example
Mount ISO Image
Now i have one ISO image if you want to mount you need to right click and select scripts ---> mount-iso

Now it will prompt for root password and click ok

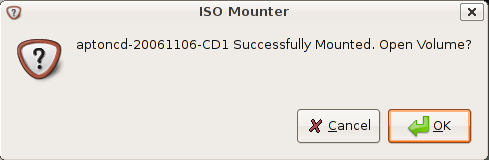
You can see the Mounter notification like the following

Here is the Successfully mounted message if you want to open this one click ok
This shows you available contents in mounted ISO image

Unmount ISO Image
Now i have one ISO image if you want to mount you need to right click and select scripts--->unmount-iso

Here is the Successfully Unmounted message

Using loop Kernel Module
First you need to make the directory to put the ISO into using the following command
sudo mkdir /media/isoimage
Now you need to add the loop module to your kernel.
What kernel loop module does?
I want to give brief introduction to kernel loop module.Using the module loop it is possible to mount a filesystem file. squashfs is a "loop" with (de)compression (Compressed Loopback Device) and it is possible to mount a compressed filesystem like a block device and seamlessly decompress its data while accessing it.
Use the following command to load loop module
sudo modprobe loop
Mount ISO Image
If you want to mount you need to use the following command
sudo mount debianetch.iso /media/isoimage/ -t iso9660 -o loop
In the above command you can replace debianetch.iso to your own iso image.
Now you should have your iso file mounted, and accessible from your desktop.
Unmount ISO Image
Unmount ISO Image Using the following command
sudo umount /media/isoimage
Make this guide easier to follow. It is disjointed and hard to follow. Where it says to move the files to the new dir’s it gives the wrong name. This causes the command to fail.
marco999
Guys, I tried to ‘mv’ command the mount.sh and unmount.sh files and it works…
I think mount-iso meant to be mount.sh
Works like a charm! Thumbs up!!
“Guys, I tried to ‘mv’ command the mount.sh and unmount.sh files and it works…
I think mount-iso meant to be mount.sh”
You’re right, it is supposed to be mount.sh
If I hadn’t seen your comment. I would have been lost. Thanks.
Very nice! Maybe this can also be done using Fuse, which can mount file systems in user space. That would mean that you don’t need sudo or to be root to mount iso’s. Just like OSX!
For more nautilus scripts, check http://g-scripts.sourceforge.net/.
Btw: You don’t need sudo to write files in your own home directory.
Beutifull.
Thanks for the screen pictures they helped me as a ubuntu beginner.
Thank you very much… Cool!!
You rock, period!!!
Worked at the firs attempt,
Thank you from México.
it’s really easy and work amazingly,
i think the nautils script method is the easyer
Its really easy … and it works… and do remember that your ISO files name should not contain any spaces….
Thanks, very usefull. Works in ubuntu8.04.
Thanks a lot from Argentina. It worked perfectly
This is so freakin’ awesome . . . yup it’s working on my ubuntu 8.04 . . . you rock!!!
Thanks man…nice work.
Um, on 7.10 ubuntu, it fails to mount when the name of .iso has a whitespace, for example “bla blup.iso”,
already fixed it though ..
Cheers
But why on earth is this not already built into Ubuntu from the start? I actually expected to be able to mount an ISO-file with a right-click option from the start. I mean, the functionality is built in, it is just hidden in a long terminal-string. I want my OS to be user friendly, as well as powerful. I should not have to go through Google, find an appropriate guide, open the terminal, find the file and mount it.
I have found an extension but it did not work. I have also tried the scripting-route described here, also without luck. But still, to search for these tools should be unnecessary. Every time I have to open the terminal to get a job done Ubuntu have lost. And I do not mean “done” as in “done more quickly” (eg. “apt-get”), but every time I have to open the terminal to get the job done at all (like mounting an ISO).
Exelent!!!
Good Job!!
It’s work fine.
This is a great tutorial. Helped me to flash that faulty bios without a floppy
Nik
for debian user that arribed here searching tools for iso, see : Iso linux converters and tools packages included the .dda and img tool in debian deb package ready to install! and manpages included!
Thanks! Worked like charm.
Thank you sir.
I am having this error when trying to mount an .iso file. I used the first guide, Nautilus scripts. The error is right after it says that the image is mounted and is…: Cannot Mount!
There are no whitespaces in the .iso filename. What could be wrong?
You saved my day.
Thank you very much!!!!
In Hardy you CAN examine an ISO file by right-clicking. Right click, choose “open with Archive Manager”. That doesn’t mount it as a normal file system, but it does let you get files from the ISO.
These scripts will allow you to mount and unmount iso’s with spaces in the file name. It removes the newline character from the end of the $NAUTILUS_SCRIPT_SELECTED_FILE_PATHS variable and sets the result to var. Than I get BASENAME from var.
Copy and paste the following into Mount-ISO.sh under ~/.gnome2/nautilus-scripts/
chmod +x ~/.gnome2/nautilus-scripts/Mount-ISO.sh
#!/bin/bash
# mount selected iso
gksudo -k /bin/echo “got r00t”
var=”$NAUTILUS_SCRIPT_SELECTED_FILE_PATHS”
var=$(echo ${var%\%})
echo VAR = :$var:
BASENAME=`basename “${var}” .iso`
zenity –info –title “ISO Mounter” –text “Mount ${var} on /media/${BASENAME}?”
sudo mkdir /media/”${BASENAME}”
if sudo mount -o loop -t iso9660 “$var” “/media/${BASENAME}”
then
if zenity –question –title “ISO Mounter” –text “Successfully mounted ${var} on /media/${BASENAME}. Open Volume?”
then
nautilus /media/”${BASENAME}” –no-desktop
fi
exit 0
else
sudo rmdir “/media/${BASENAME}”
zenity –error –title “ISO Mounter” –text “Could not mount ${var} on /media/${BASENAME}!”
exit 1
fi
Copy and paste the following into Unmount-ISO.sh under ~/.gnome2/nautilus-scripts/
chmod +x ~/.gnome2/nautilus-scripts/Unmount-ISO.sh
#!/bin/bash
# Umount selected iso
gksudo -k /bin/echo “got r00t?”
var=”$NAUTILUS_SCRIPT_SELECTED_FILE_PATHS”
var=$(echo ${var%\%})
BASENAME=`basename “${var}” .iso`
zenity –info –text “Unmount /media/${BASENAME}?”
sudo umount “/media/${BASENAME}”
sudo rmdir “/media/${BASENAME}”
zenity –info –text “Successfully unmounted /media/${BASENAME}”
exit 0
Finally… I get something done right in Ubuntu for the first time! Thanks a lot!!!
thanks, the second way works perfectly.
Does anybody knows how to make Synaptic think of this mounted iso as a real cdrom (E:) to install some packages from it
sorry for grammatics and being lamer))
Thanks, this worked great.
i did as said above but it doent work help please
I’ve created my own, 1-file solution. While not as fancy as some, it DOES support writing to the files, it DOES support spaces in the file name or directory, it DOES notify you if it worked or not, and it DOES work for different types of images (definitely ISO and floppy images, most likely others).
It’s located at http://ubuntuforums.org/showthread.php?t=52255 (the very last script on the second post).